LOW&SLOW Smoked Brisket Recipe
Today I'm bringing you a recipe for smoked brisket, the ultimate in Texas barbecue. It's a smoky barbecue dish that uses a grill and charcoal to impart a smoky flavor. The brisket cuts of beef are cooked slowly at low temperatures in a crock pot. It can be quite a laborious process if you're not used to it, as it requires long hours of cooking and attention, but once you taste the smoky flavor of the brisket, you'll be impressed. Smoked barbecue at its finest! Let's get started with the smoked brisket recipe.
What is a brisket?
Brisket is a tender, crisp cut of beef located in the breast area, just below the ribs. It's used heavily to support the cow's weight, giving it a firm, fatty character.
This cut is used in a variety of cuisines around the world, but it's especially known as an essential ingredient in Texas-style barbecue, where brisket is smoked at low temperatures for long periods of time to maximize its tender, moist texture and smoky flavor.
The history and tradition of brisket
Origins:
The brisket dish is believed to have originated in the Jewish communities of Europe, where it was traditionally salted or slow-cooked for long periods of time.
Symbols of Texas barbecue:
In the early 1900s, German and Czech immigrants in the Texas area began cooking brisket the smoked way, and Texas barbecue as we know it today was born. It's characterized by the use of simple seasonings (salt and pepper) to bring out the full flavor of the meat.
The centerpiece of modern barbecue:
Over time, brisket has become a staple of barbecue across the United States, and it's now one of the most important dishes at Texas barbecue contests and festivals.
The appeal of cooking brisket
- Low temperature cooking:
When cooked at a low temperature for a long time, the collagen in the meat turns to gelatin, creating a tender, moist texture. - Smoky:
Cooking with grills and smoked chips infuses the meat with a deep, rich smoky flavor that adds a special touch.
For more information about brisket, see 👉 herefor more information.
Recipe information
Recipe information
Preparation materials
- Beef brisket (brisket) : 1 whole brisket
- Salt : 1 to 21 TP3T of trimmed meat
- Pepper : 1:1 ratio to 1:2 ratio with salt
- Olive oil : moderate amount
By measurements: I used 1T=15cc, 1t=5cc measuring spoons.
Tools used
- Draw Use size : 57
- Briquettes : 15 complexes, 48 snake arrays, with a generous supply of 15 complexes
- Smoked Chunk Can be substituted with smoked chips, pelleted smoke
- Deep thermometer : 2-channel recommendations
- ChimneyStarter : Small Chimney Starter (large inverted available)
- Lighter Cube : 2 pills
- Thermal gloves
- BuddhaPaper
- Aluminum containers
For more information about the products used, see "About the products used" below.
The creation process
Trimming the brisket
You'll need to trim the brisket before you cook it, and while there's a lot of waste in the process, it's important to get it right the first time because the nature of barbecue is such that if you don't shape it properly, it will dry out and become tough and inedible during the long cooking time. I've put together a detailed step-by-step trimming guide below.
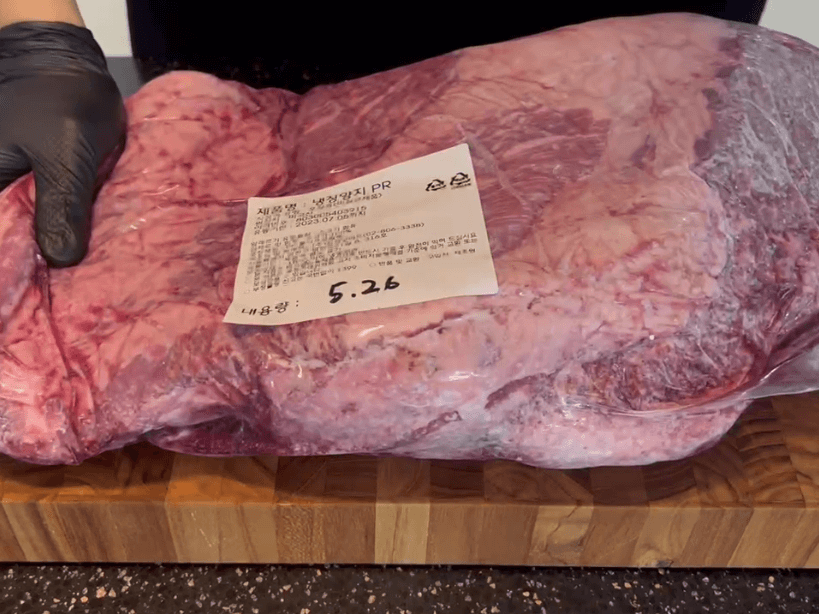
Preparing raw meat
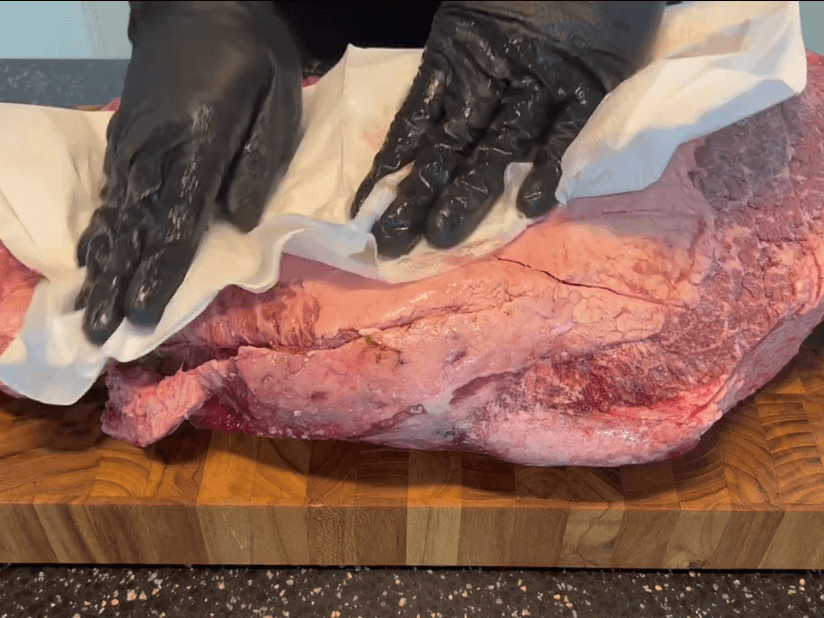
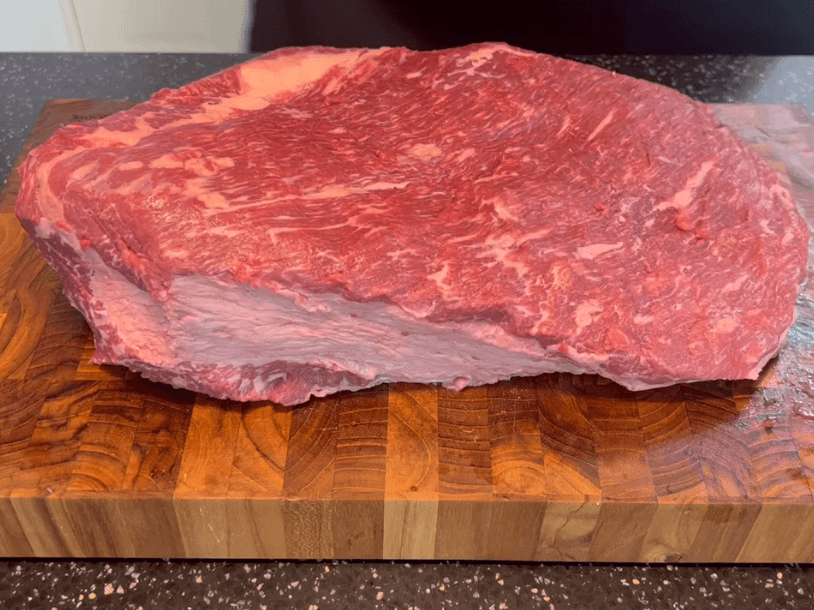
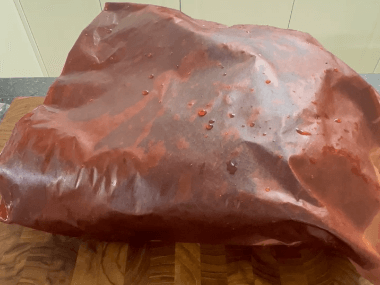
If the brisket is frozen, thaw it in the refrigerator for at least one day. Remove the brisket and blot it with paper towels.
I used a refrigerated prime grade, but brisket varies a lot depending on the cut, so once you get the hang of it, try a good cut.
💡 Tip: Trim the fat while it's still slightly frozen, before it's completely thawed, for easier trimming.
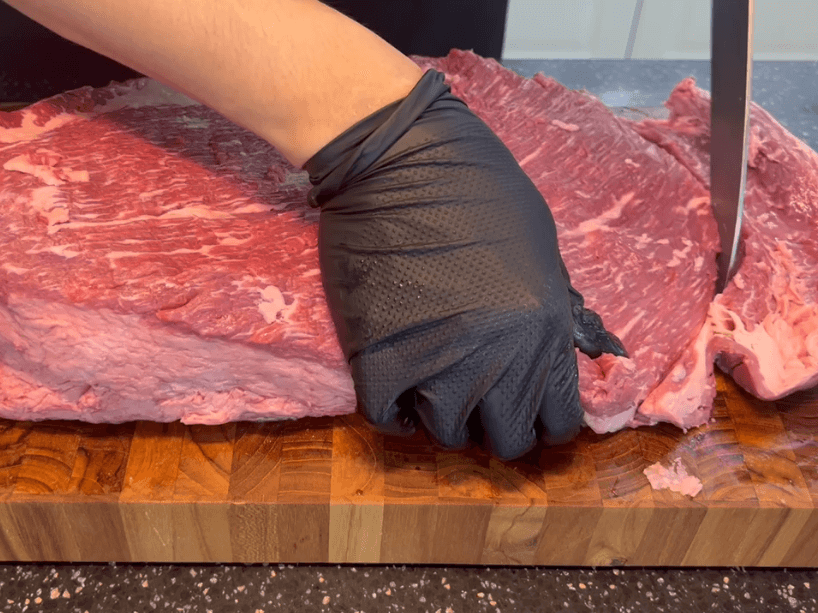
Trimming the Bottom
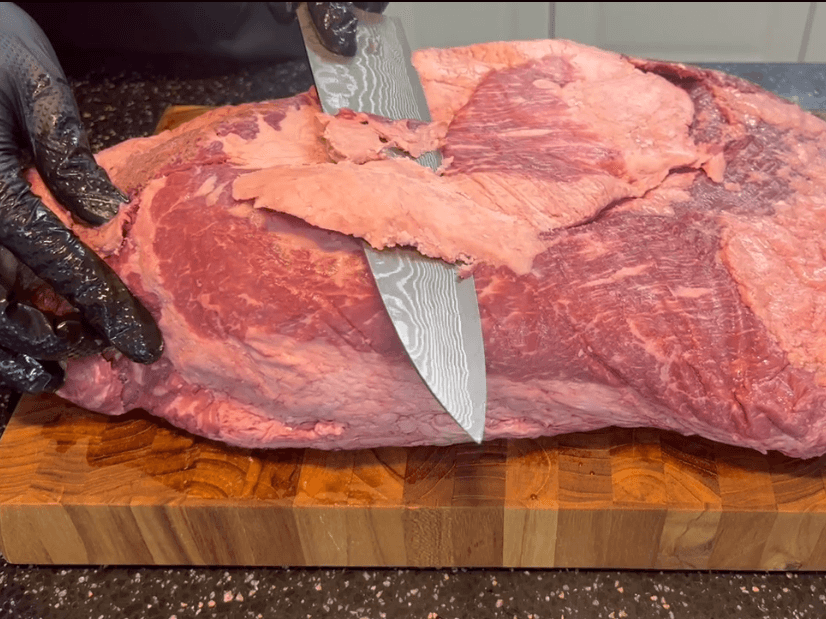
Start with the underside of the brisket. Start by removing the fat that's clinging to the surface of the meat, followed by the army of fat and thin layer of fascia.
💡 Tip: Lay the knife down on the grain of the meat to remove it, working in reverse will tear the flesh and make a messy job.
Remove corners
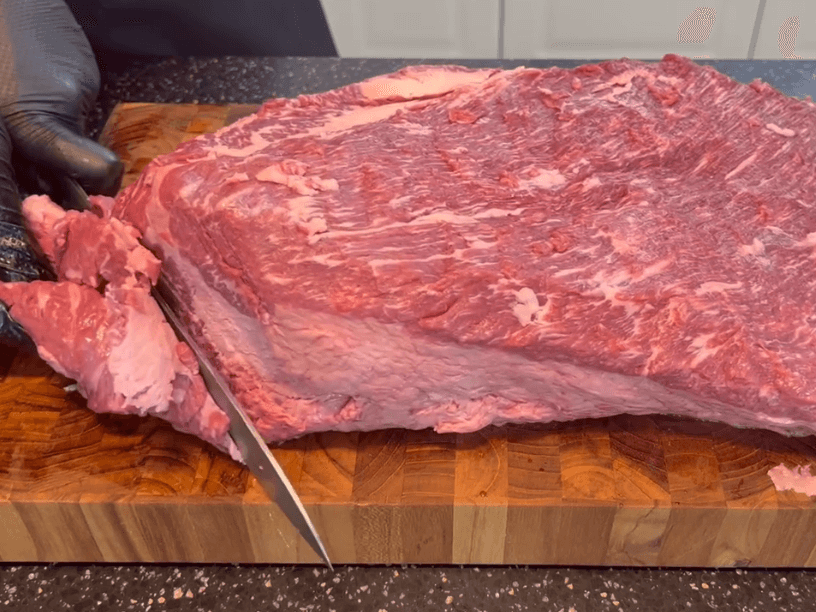
Use a tong to remove thin corners that can easily dry out or burn during cooking.
This gives the brisket a more uniform shape and allows for consistent cooking.
💡 Tip: You'll lose a lot of raw meat in this process, but it's for your own use, so go for it.
Trimming the top
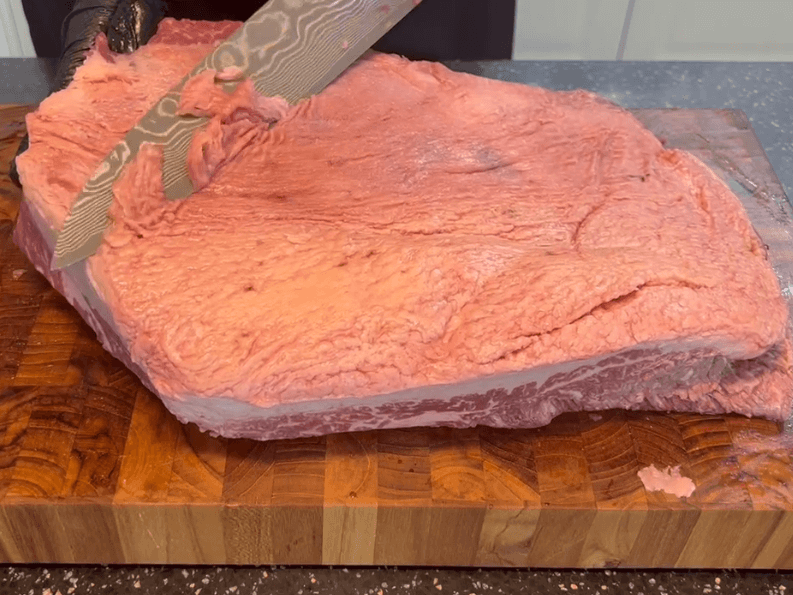
Turn the brisket over and remove a thin layer of fat from the top.
Ideally, you'll want to leave the fat 1-2 millimeters thick, but if that's not realistic, trim it evenly and only remove dirty or thick areas.

Then trim the fat from the sides to refine the shape.
A certain thickness of fat protects the meat during cooking and prevents the outside of the brisket from burning.
💡 Tip: You want to make sure you have enough fat to keep the meat moist.
The trimming is complete
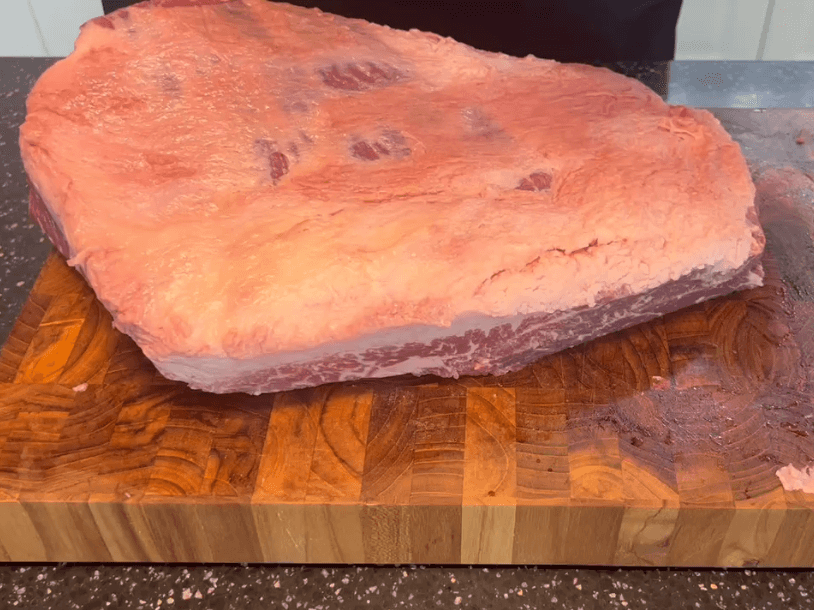
The top trimming is complete.
This is what the bottom trimming looks like when complete.
Applying Rubs
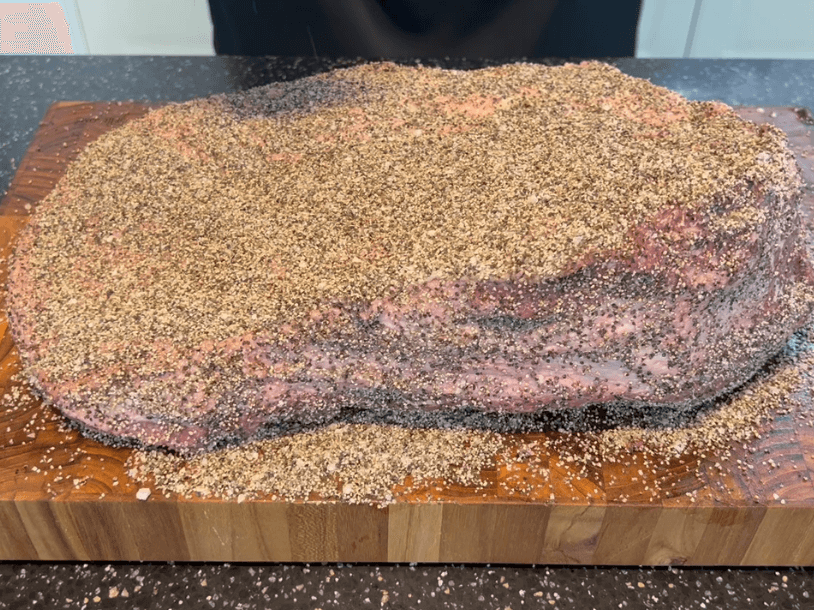
Make a simple rub by combining salt and pepper. You can add any other ingredients you like to the rub, but I used just salt and pepper to get a better sense of the beef's natural flavor.
The amount of salt is based on the trimmed 11 TP3T to 21 TP3T of meat weightas a reference. I chose 1% as a reference point to serve with the sauce.
The amount of pepper can be 1:1 or 1:2 based on the salt, to your taste. I used a 1:2 ratio.
💡 Tip: Add garlic powder, onion powder, paprika powder, chili powder, chili powder, and more to customize your rub to your liking.
Utilizing leftover meat
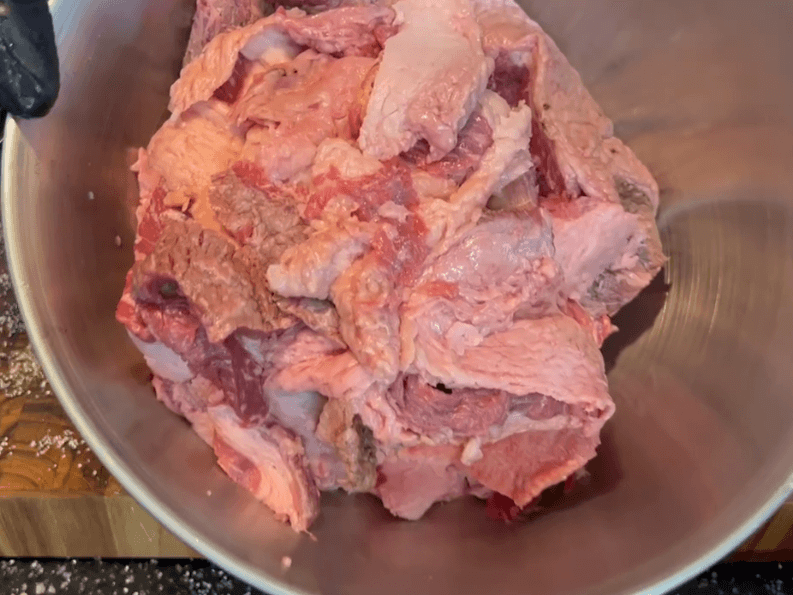
After trimming, the leftover meat scraps and fat can be set aside to make beef stock or rendered to make beef tallow.
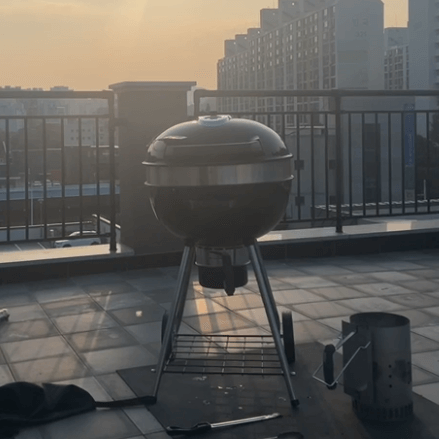
Setting up the grill (snake arrangement)
Specialized bricket placement is required to maintain the desired temperature on the grill. We'll walk you through the how and why of bricket placement and setting up the necessary tools in the detailed guide below.
Arranging brickets
To start, stack three briquettes on top of each other and you can maintain a temperature of 110°C (230°F) for about an hour.
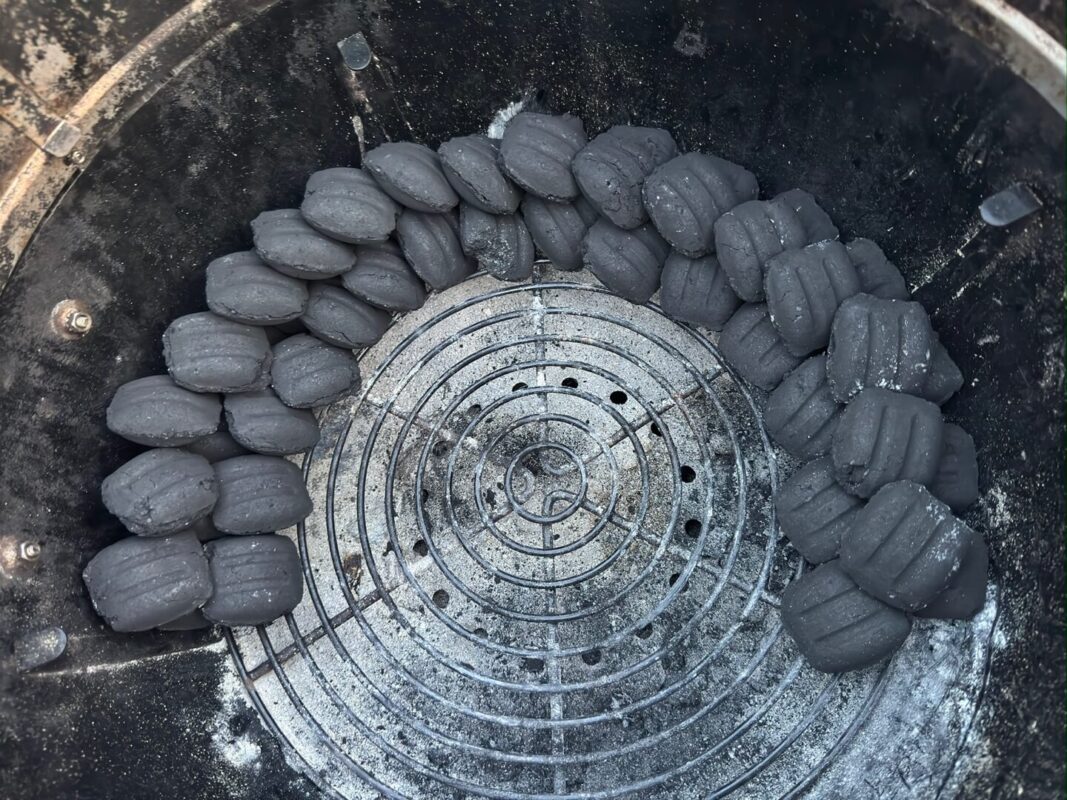
For long cooking times at low temperatures, you'll need to use a snake arrangement, where three briskets are placed in a long row.
Make enough brickets for the amount of time you need (15-16 hours).
💡 Tip: Make sure the sides of the brisket are as close together as possible to keep the heat steady and uninterrupted.
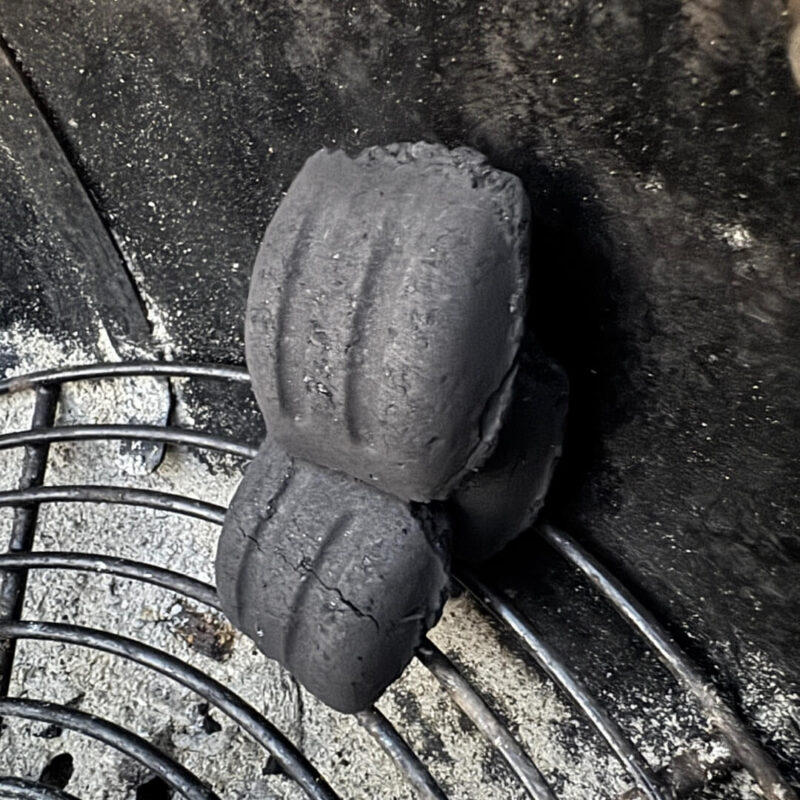
To wear a bricket
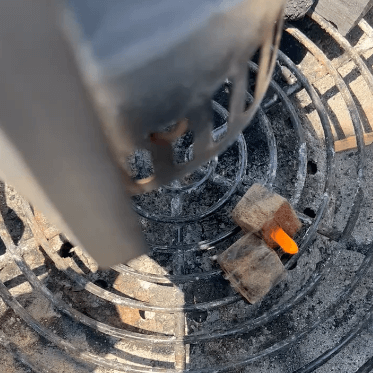
Add 15 brickets to a small chimney starter. If the temperature is very low, add 1 or 2 brickets.
Light the two lightercubes and place the Chimney Starter on top of the lightercubes.
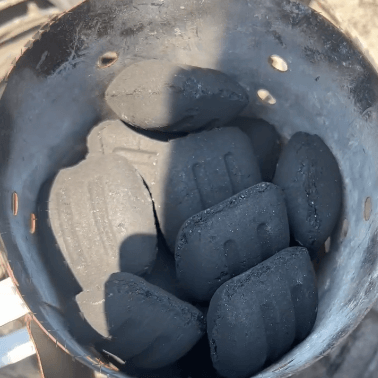
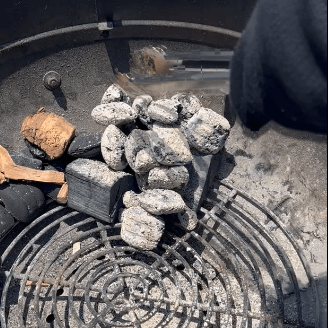
Once you see smoke rising above the starter, wait 20-25 minutes to allow the bricket to fully ignite.
When the top bricket turns white, the pairing is complete.
Prepare your smoking ingredients
Smoked chips: If using smoked chips, soak them in water for at least 30 minutes to prepare.
Smoked Chunk: If you're using smoked chunks, you can use them without soaking them in water.
Smoke Tube: Place the pellets in the smoke tube, light them, and place them near the brickets. Be careful with the amount of pellets, as they can raise the temperature inside the grill.
Placing
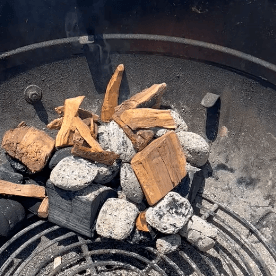
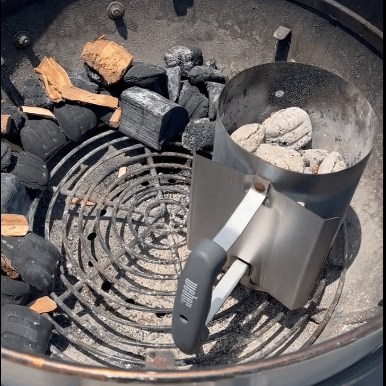
Stack the colonized briquettes at the start of the snake array.
Place the smoked chunks directly on top of the colored briquettes.
Add a small amount of smoked chunks to the unlit briquettes as well, so that they have a continuous smoky flavor.
💡 Tip: Smokiness is maximized in the early hours (2-4 hours) after cooking begins.
Placing the Drip Pan
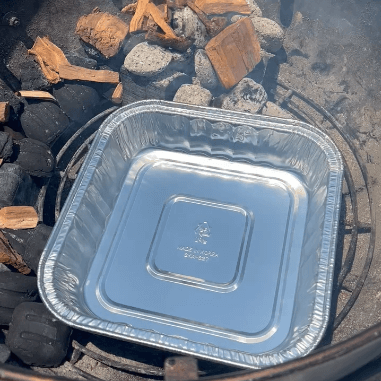
Place the grease trap (drip pan) furthest away from the ignited brickets and the fire.
The meat will be placed over the grease tray.
💡 Tip: Grease traps make it easier to clean and maintain your grill.
Waterpan placement
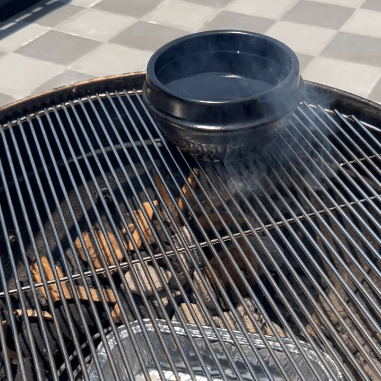
Raise the grill and place the water pan directly over the flame.
Ideally, the water pan should be filled with warm water.
Brisket placement
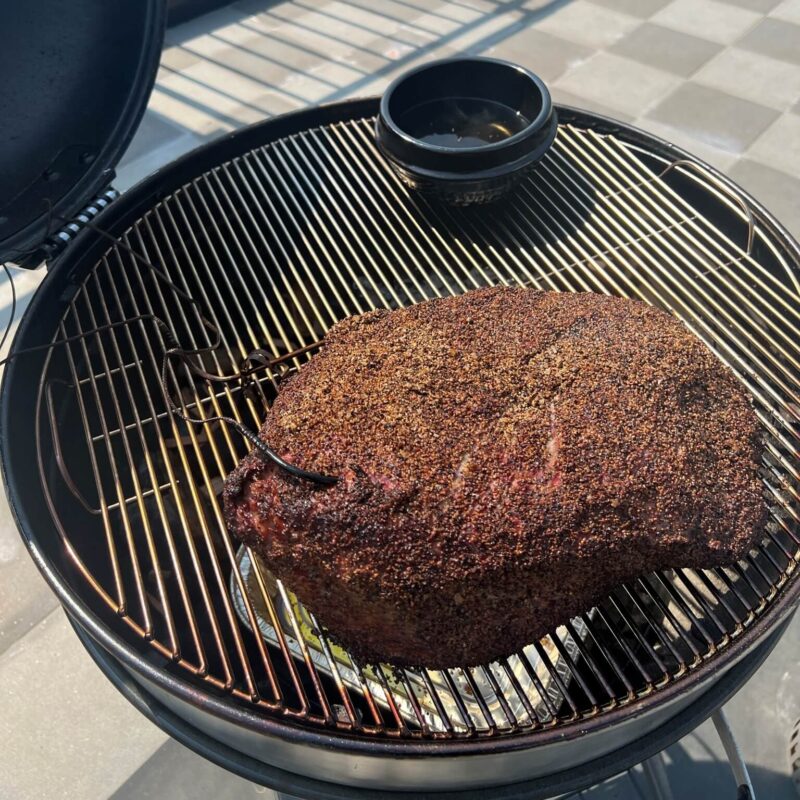
Place the brisket on the grill on top of the grease tray farthest from the fire.
Placing it away from the fire prevents the meat from receiving excessive heat and overcooking.
Install the thermometer
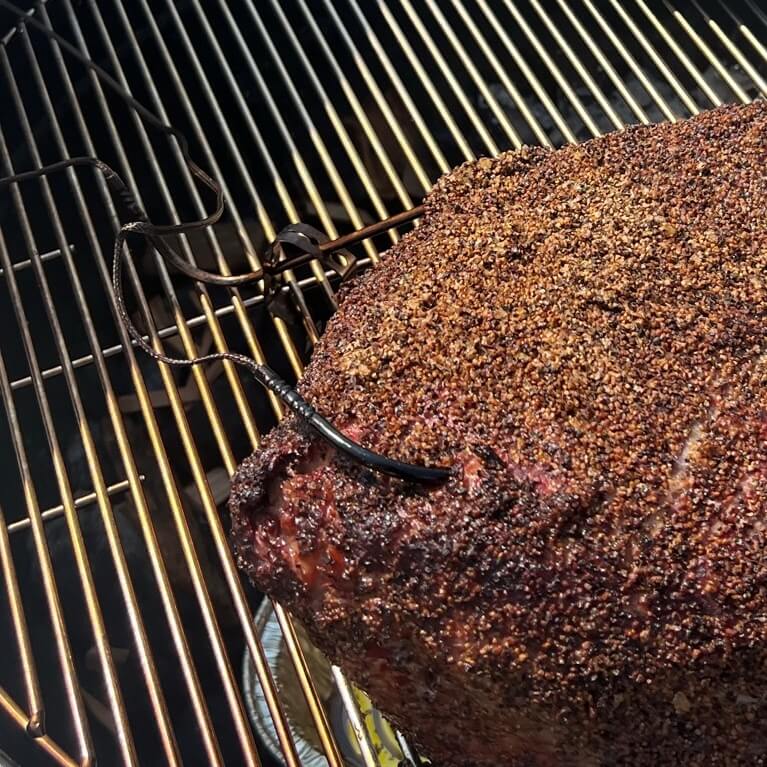
Insert the thermometer deep into the lean side of the meat.
The thermometer should be inserted into the center of the meat to get an accurate core temperature.
The other thermometer can be placed next to the meat to get an accurate reading of the actual temperature the meat is receiving.
For wired thermometers, install the thermometer through the top dampers.
Verify temperature stabilization
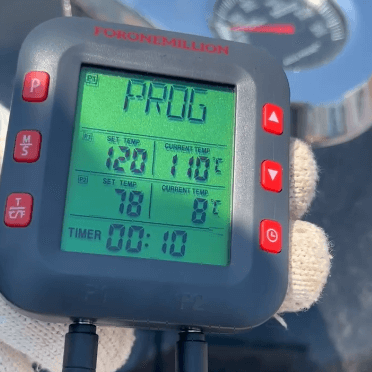
Open both the bottom and top dampers to allow for better airflow.
Close the lid and let the temperature stabilize for about 10 minutes.
Adjust the top damper to keep the temperature near 230°F (110°C).
💡 Tip: Each time you reduce the top damper by 1/3, the temperature drops by about 10°C.
After adjusting the dampers, wait about 10 minutes to see if the temperature stabilizes.
Cooking on the grill
Leave the lid off for the first 3 hours to maximize the smoking process, and then we'll manage the internal temperature of the grill, periodically flushing and refilling the water pan. The primary goal is to achieve a core temperature of 75°C (167°F) for the meat.
Prepare for spreading
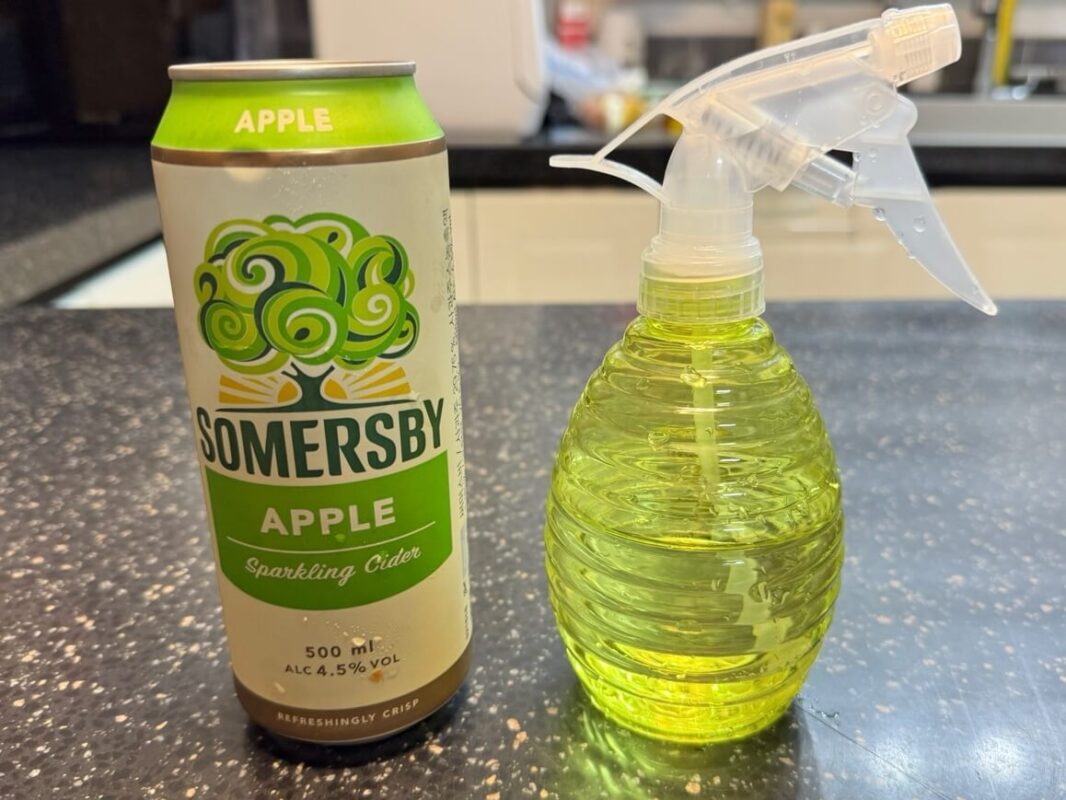
Make a spreading liquid in a sprayer. The three recipes below are common and you can use other juices with water, or if you don't have the ingredients, just spray with water. If you use it cold, make sure to leave it at room temperature to reduce the surface temperature of the meat.
- A liquid mixture of apple cider vinegar and water in a 1:1 ratio.
- A mixture of apple juice and water in a 1:1 ratio.
- I used a mixture of Summersby Apple Beer and water.
💡 Tip: Dilute it with water, as too much sugar will make it bitter and too much acid will make the meat tough.
Spreading

After 3 hours, remove the lid and spray the surface of the meat 5-6 times.
You should work as quickly as possible so that the temperature inside the grill doesn't change dramatically.
The fire should have moved along the brickets as you spread them, so adjust the grill so that the water pan is above the fire and refill the water pan with water, preferably warm water.
Repeat every 1-2 hours.
Wrapping
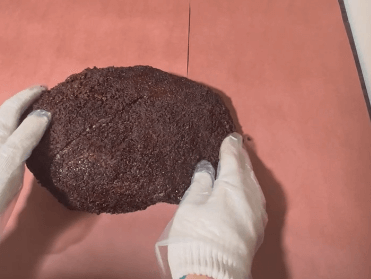
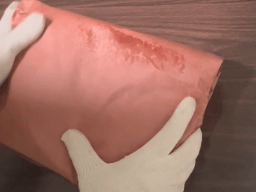
Once the core temperature of the brisket has reached 75°C (167°F), wrap the brisket in butcher paper. It's important to wrap as tightly as possible, as this will protect the bark while keeping the meat juicy and flavorful.
Before wrapping, remove the thermometer from the meat, wrap it in butcher paper, and reinsert the thermometer through the butcher paper.
The thermometer should be inserted deep into the center of the meat, on the lean side, to accurately measure the internal temperature.
Putting it on the grill

Place the wrapped brisket on the side of the grill farthest from the heat. You can remove the water pan and grease tray at this point. Close the lid and make sure the internal temperature of the grill is maintained at 110°C (230°F).
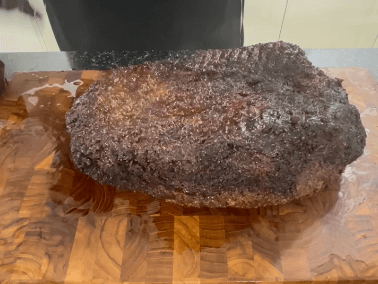
Cook to target temperature
Maintain the temperature of the grill and aim for an internal temperature of 90°C (194°F) to 95°C (203°F) for the brisket. The difference between the target temperatures is
90°C (194°F)
Flavor: The flavor is rich and juicy. The meat's natural flavor and smoky aroma are strong.
Texture: It is soft but still has a slight chew to it. There is some resistance when tearing with a fork.
Best for: Thinly sliced, perfect for sandwiches, tacos, and more.
95°C (203°F)
Flavor: The fat is completely melted and the flavor is concentrated. The juices will be reduced, but the meat will taste richer.
Texture: It is extremely soft and tears easily with a fork. The grain separates and melts away.
Best for: Tear it up pulled pork style, or if you prefer a very tender texture.
Listing
Utilize Styrofoam boxes
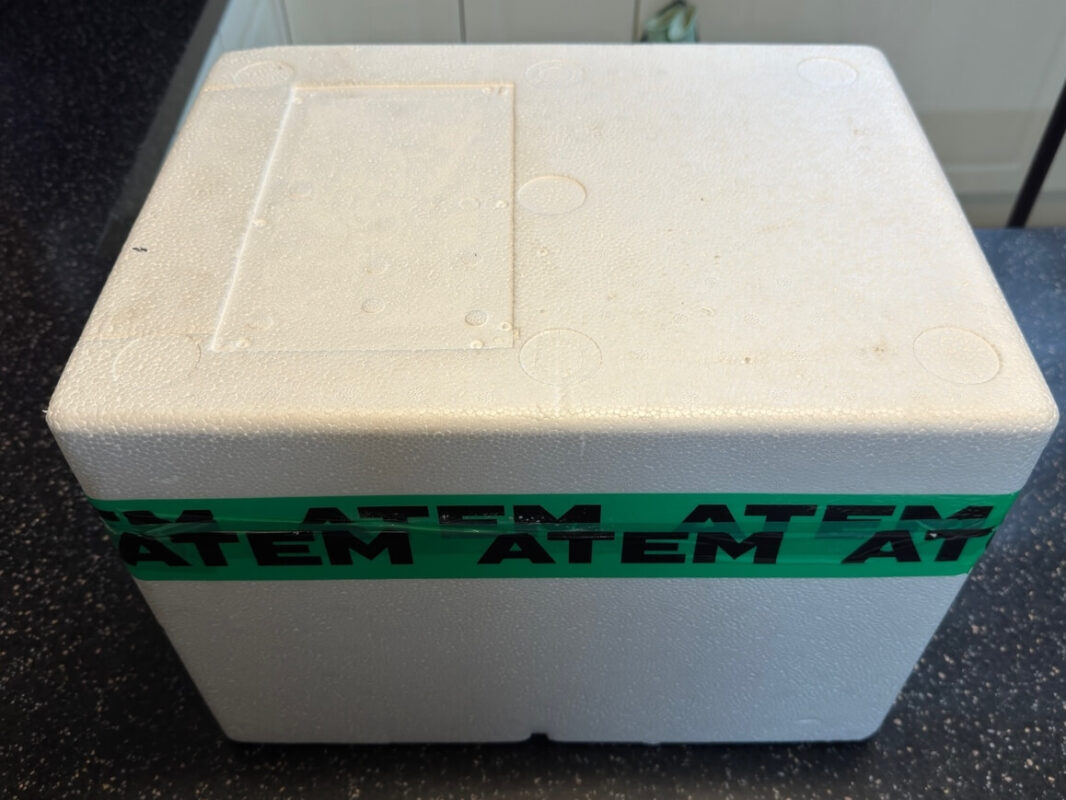
When you order a brisket, you can use the styrofoam box it came in.
Warm the Styrofoam box with warm water before use, wipe it dry, and use it to further increase the insulating effect.
Once the brisket has reached the target temperature, simply wrap it in butcher paper and place it in a styrofoam box.
Styrofoam box alternatives
If you don't have a Styrofoam box, you can use a thick cooler (ice chest) or cover it with a towel and double insulate it to keep it warm.
Listing time
Ideally, you want to cook the meat to a point where the internal temperature reaches your target temperature, rises slightly, and then starts to fall back down.
An hour of baking is usually enough, and they can stay warm for up to two hours.
💡 Tip: When you take the butcher paper out of the box, make sure it's wet enough to allow the juices to circulate and the meat to rest moistly. If the paper is dry or not wet enough, it could be a sign that the juices aren't being absorbed properly.
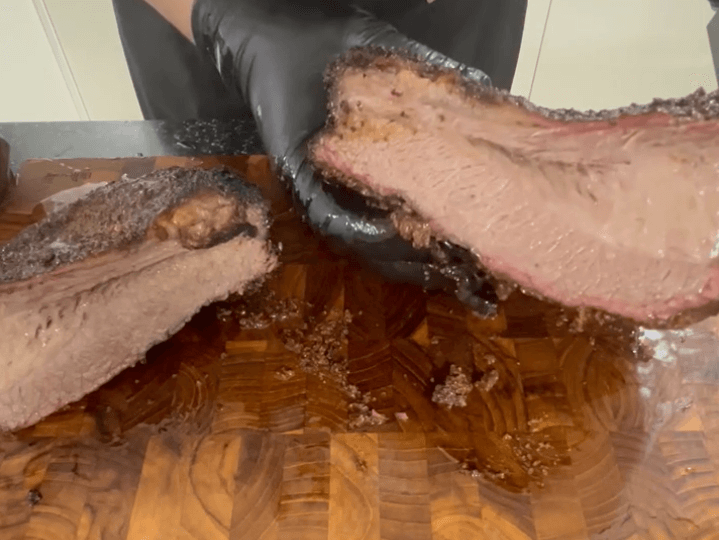
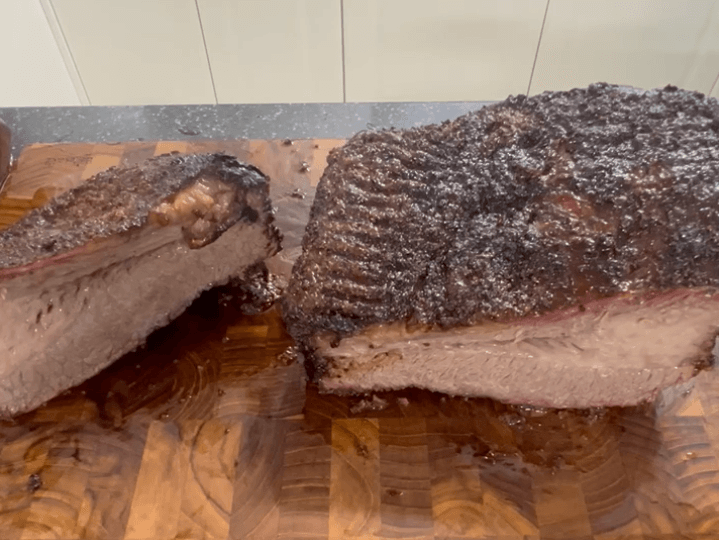
Making cuts
The brisket is divided into two parts, and the cuts are different, so familiarize yourself with the guide below before proceeding.
Separating points and flats
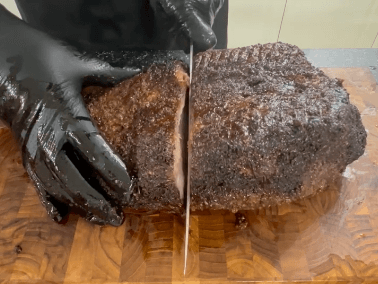
- Find the point where the thick (point) and thin (flat) parts of the brisket meet.
- Use a knife to trace along the area where the parts meet. Separating points and flatsin the file.
- Points and flats have different grains, so you'll need to cut each after separation.
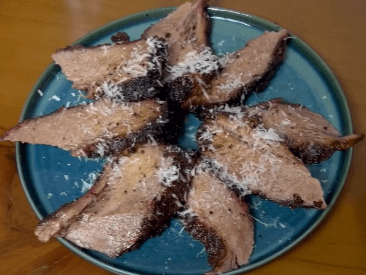
Point cutting
- The point is in a different grain direction than the flat, so turn the meat 90 degrees to make the cut.
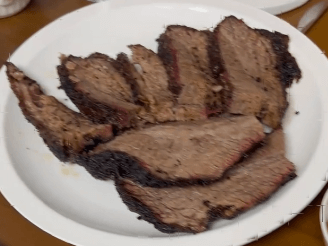
- Cut the points into 2 cm thick slices and serve as a chunk, or cut into cubes and serve.
- The pork has a high fat content, so if you cut it too thin, the fat and bark will collapse, so it's best to keep it at a reasonable thickness.
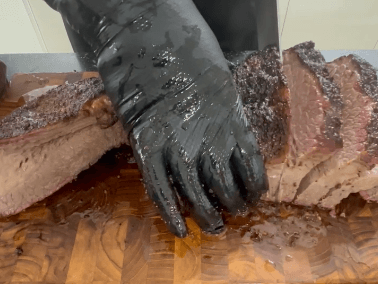
Flat cutting
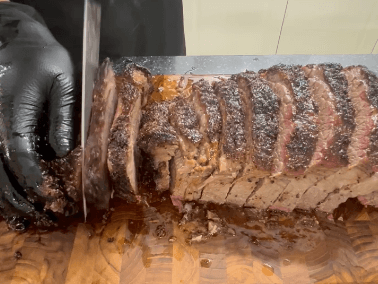
- Slice the meat thinly against the grain. Just cut in the direction of the cross-section you separated.
- Slices should be about 0.5 to 1 centimeter thick.
Serving and storage
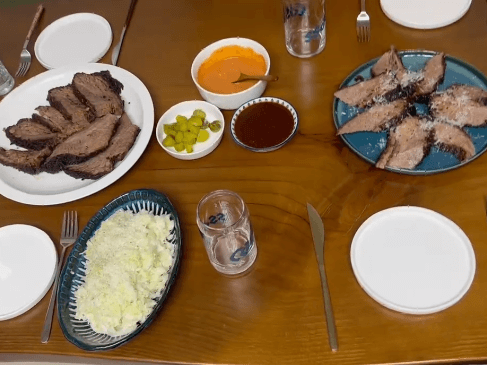
- Because of the nature of grilled barbecue, it's hard to predict exactly how long it will take to cook, so if you schedule your appointment with an extra two to three hours on top of the estimated time, you can cook it ahead of time, keep it warm, and serve it at your convenience.
- No matter how delicious you make it, eating just chunks of meat can get boring. Try serving sides like sauces, pickles, bread, coleslaw, and more.
- Vacuum and freeze leftover brisket. To defrost, simply place the vacuum bag in hot water.
Product information used
A raw brisket: You can also find brisket at Costco as a raw brisket 👉. See products
Draw: Napoleon Promaster Grill. Equivalent to the Weber 57. 👉 . See products
Bricket: I usually use a HeatBead or Weber Briquette 👉. See products
Smoked chunks: Weber hickory chunks for a smoky flavor 👉. See products
Core thermometer: This dual 2-channel thermometer is a great value for the money 👉. See products
Chimney starter: Weber Chimney Starter (small). It doesn't fold up, but it's super sturdy and will last a lifetime. 👉 . See products
Lighter Cube: Weber lighter cubes are used to light briquettes 👉 . See products
Thermal gloves: : It's a Weber, and it's pricey, but it's super heat resistant (I accidentally grabbed a charcoal and it was a little warm) 👉 . See products
BuddhaPaper: Food grade kraft paper that helps form a crispy crust while retaining moisture. 👉. See products
Aluminum containers: It can be used as a grease trap or water pan and can be used multiple times when used for that purpose. 👉 â See products
"This post is part of my work with Coupang Partners, which means I get a commission if you click on the links. This may not be the lowest price, so please check the product information and shop around before purchasing."
Create video
Closing thoughts
Brisket is a labor-intensive and time-consuming dish, but it's one that's incredibly satisfying when it's done. With the help of our smoked brisket recipe and guide, you'll be able to impress your family and guests with tender, moist brisket.
Be sure to give yourself a pat on the back when you're done cooking! Brisket isn't just a dish, it's a Barbecue artbecause that's what it is. 🍖
Now you can serve your brisket in style and enjoy an unforgettable barbecue. The food and time shared will be remembered fondly for years to come.
Until then, have a delicious day with this smoked brisket recipe 😊.
Suggested dishes to prepare together
- Cabbage Coleslaw Recipe - Lafestyle A light, not-too-sweet recipe.
- Cheesy Oven Baked Potatoes Recipe - Light side dishes.
- Aligot Potato Recipe - Stretchy cheesy potatoes.